Last updated 2026-07-10
TL;DR
Photographs are some of the cheapest, most persuasive evidence you can bring to a property tax appeal. Shoot every room, every defect, and every feature that makes your home worth less than the assessor assumed. Date-stamp the files, label them clearly, and print them in color. Photos alone have reversed assessments by thousands of dollars.
Why do photos actually matter at a property tax appeal?
The assessor almost never walks inside your home. In most counties, mass appraisal software estimates your value from permit records, sales data, and a drive-by look at the exterior. The system assumes your kitchen was updated because your neighbor's was. It assumes your 1,400-square-foot ranch is in average condition because average is the default. Your job at a hearing is to prove those assumptions wrong.
Photographs do that fast. A hearing officer reviewing fifty appeals in a day trusts concrete visual evidence far more than a homeowner describing peeling ceilings out loud. Several state appeal boards list photographs as accepted evidence in their published procedures, including California's Assessment Appeals Manual [1]. The Illinois Property Tax Appeal Board goes further and requires that photos entered as exhibits carry a date [2].
The other reason photos matter is that they are hard to argue with. A comparable-sales case asks the hearing officer to follow price-per-square-foot adjustments. A photo of a collapsing retaining wall needs no explanation. It sits in the record and speaks for itself.
One more thing. Photos are free. You already own a smartphone that shoots court-quality images. Contingency firms charge 30 to 50 percent of your first year's savings. A two-hour self-guided photo session plus $15 in color printing costs you almost nothing.
What equipment do you actually need to photograph your home for a tax appeal?
You do not need a professional camera. A smartphone made after 2018 shoots at 12 megapixels or better, which is more than enough for printed exhibits. Here is the short list of what you do need.
1. A phone or camera with the date and time confirmed correct. Check this before you start. 2. A tape measure or laser measure, for shots where size matters (a garage converted to living space, a bathroom missing its tub, a room with a sloped ceiling that cuts livable square footage). 3. A notepad to log each photo with a one-sentence description as you go. You will forget what you shot six weeks later. 4. Good light. Shoot interior defects with the lights on and with natural light where you can get it. Dark rooms hide cracks. Bright rooms show them.
A wide-angle lens attachment (around $15 online) helps in tight bathrooms and small rooms, but it's optional. Skip anything with fish-eye distortion. It makes rooms look larger than they are and works against your own argument.
If your appeal turns on a defect you say the assessor missed, rent a moisture meter (around $20 a day at hardware stores) and photograph the reading next to the damaged wall. That turns a photo from "subjective damage" into a documented measurement.
Which parts of your home should you photograph first?
Start with anything that would lower value if a buyer saw it. Think like an inspector writing a disclosure list, not an agent trying to sell. Here is the priority order.
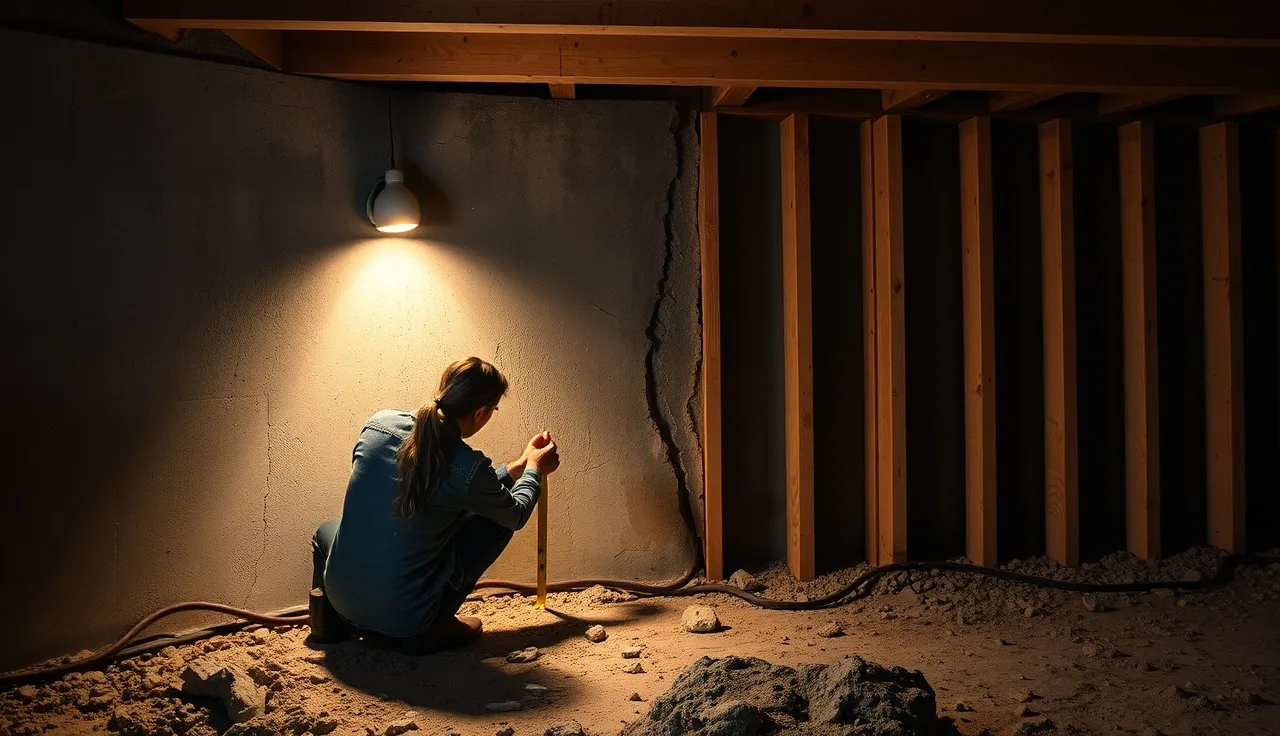
Condition defects (highest priority) Cracks in foundation walls or slabs, water stains on ceilings, bowing or buckled walls, roof damage visible from the attic, HVAC units past their useful life, outdated electrical panels (knob-and-tube or fuse boxes), crawl space moisture, rot on exterior trim or sills, failing retaining walls, damaged driveways or walkways. Each one is a value-reducing factor an assessor's model may have missed.
Rooms smaller or less finished than a typical home in your area If your kitchen has original 1960s cabinets and the assessor's data card says "average" condition, photograph it. If your bathrooms are one-piece fiberglass units and the model assumes tile and granite, photograph them. The property record card, which you can usually request for free from the assessor's office, tells you what condition grade and features the office assigned to your home [3]. Photograph every discrepancy.
Exterior features that reduce value Busy street frontage, a cell tower next door, commercial neighbors, a power line easement across the backyard, a sloped lot that limits usable yard space, a driveway that floods. These are locational and functional obsolescence factors that mass appraisal models often skip.
What to skip Don't photograph your nicest rooms or your best features. You're not selling the house. A photo of your renovated master suite helps the assessor, not you.
How do you document a specific defect so a hearing officer takes it seriously?
A single photo of a crack is weak evidence. A documented defect sequence is strong. For any real defect, shoot at least three images.
The establishing shot. Stand back and show where in the room or on the exterior the defect sits. This gives the hearing officer context.
The close-up. Move to within two or three feet. Fill the frame. If it's a crack, put a coin or a ruler next to it for scale.
The measurement shot. If you can do it safely, use a tape measure to show the width of a crack, the depth of a sag, or the spread of a stain. A stain covering 40 percent of a ceiling reads very differently from one covering 5 percent.
If you have a repair estimate, photograph the estimate form next to the defect. A written estimate from a licensed contractor is excellent evidence on its own, and pairing it with the photo ties the two together.
For water intrusion, photograph the damage both dry and, if you can safely wait for rain, wet. Wet stains show up harder. Add any moisture meter readings.
Date-stamp every file. Most smartphones embed the date in the EXIF metadata automatically, but some boards also want a visible on-screen timestamp. Turn that on in your camera app or use a free watermarking app.
How do you photograph the exterior and neighborhood to support an appeal?
Walk the full perimeter of your lot before you go inside. Shoot the front, both sides, and the rear from far enough back to show the lot context. Common exterior issues worth documenting:
- Roof condition: missing shingles, curling, moss growth, visible sagging.
- Foundation: visible cracks, settlement, efflorescence (white mineral deposits that signal water migration).
- Siding: rot, gaps, faded or peeling paint that would alarm a buyer.
- Garage: doors that don't close properly, cracked slabs, framing that's deteriorated.
- Grading and drainage: spots where water pools near the foundation.
For neighborhood obsolescence, walk or drive the block and photograph what a buyer would notice: a junkyard next door, a truck depot across the street, a condemned property adjacent to yours. These are external obsolescence factors recognized under the cost and income approaches to value. Assessors are supposed to account for them, and often don't [4].
One tactic that works: photograph the view from your front door and your backyard. If your view is a concrete sound wall for a highway, document it. If the comparable sales the assessor is using have park views or cul-de-sac settings, those photos become part of your argument that your property and theirs are not equivalent.
How should you organize and label your photos before the hearing?
Organization matters as much as the photos. A disorganized pile of 80 images creates confusion and resistance. A clean, labeled exhibit binder creates credibility.
Here's a system that works.
On your computer or phone, create a folder for the appeal. Inside it, make subfolders: Exterior, Kitchen, Bathrooms, Bedrooms, Basement/Crawl, Defects, Neighborhood. Move photos into the right subfolder right after shooting.
Rename every file before printing: "01_front_exterior.jpg", "02_roof_SE_corner.jpg", "15_kitchen_cabinets.jpg". Numbered names print in order and let you point to "Exhibit Photo 12" in your written statement.
Print in color. Black-and-white prints hide water stains, rust, and moisture. Color prints run roughly $0.25 to $0.50 per page at a drugstore or office supply store. A 30-photo appeal costs about $10.
Build a one-page photo log with three columns: Photo Number, Location, Description of Issue. Hand this to the hearing officer first. It tells them what they're looking at before they look.
Some counties now take digital evidence through a portal or on a USB drive. Check your local board's submission rules well before the hearing date. The Cook County Board of Review, for example, runs an online evidence submission portal for its appeals [5].
If you're using the TaxFightBack appeal kit, it includes a printable photo log template you can fill in as you shoot.
What should your photos show to compare with the assessor's property record card?
The property record card (also called a property data card or field card) is the document you're fact-checking with your photos. Request it before you pick up a camera.
In most states you get the data card by calling the assessor's office, visiting in person, or downloading it from the assessor's website. It lists year built, square footage, room count, quality grade (typically Fair, Average, Good, Very Good, Excellent), condition, basement finish, garage type, and improvements [3].
For each field, ask one question: does my photo evidence match what's recorded here? Specific discrepancies to hunt for:
| Data Card Field | What to Check | What to Photograph |
|---|---|---|
| Condition grade | Assessor says Average; is it really Fair? | Defects, outdated finishes |
| Basement finish | Listed as Finished; is it partly unfinished? | Unfinished areas, exposed joists |
| Garage | Listed as attached; is it a carport or falling down? | Actual garage condition/type |
| Extra bath | Listed as 2.5 baths; do you have 1.5? | Every bathroom in the home |
| Fireplace | Listed as 2; you have 1 | Each fireplace or lack thereof |
| Quality grade | Listed as Good; is it Average? | Kitchen, baths, trim, finishes |
Every discrepancy you can photograph and place next to the data card is a direct argument for a lower assessment. Many DIY appeals win on nothing more than proving the assessor counted a room or feature that doesn't exist, or assigned a higher quality grade than the real condition earns.
Can photos alone win a property tax appeal, or do you need more evidence?
Photos alone can win on factual errors. They're strongest when paired with other evidence.
If your argument is "the assessor thinks I have a finished basement and I don't," a photo is nearly dispositive by itself. You're correcting a factual mistake, and the photo is direct proof.
If your argument is "my house is worth less than the assessed value," photos support the case but don't close it. You also need comparable sales (properties like yours that sold for less than your assessed value implies) or, sometimes, a recent appraisal. The International Association of Assessing Officers, in its Standard on Mass Appraisal of Real Property, treats sales data and cost analysis as the primary valuation methods, with property condition as an adjustment factor [3]. Your photos give that condition adjustment its factual basis.
The Lincoln Institute of Land Policy, which studies property tax administration, reports that appeals go better when the appellant brings more than one form of evidence rather than a single argument [6]. There's no clean published success-rate split by evidence type, so I'll be honest about the limit of the data. The direction is clear even if the exact percentages aren't: photos plus comps beat photos alone.
For most DIY appeals, a solid packet is four things: (1) the assessor's data card with errors circled, (2) photographs documenting those errors and any condition defects, (3) three to five comparable sales from the same neighborhood that sold below what your assessed value implies, and (4) a written narrative tying it together. That's a full hearing packet, and it needs no attorney or appraiser.
Are there rules about photo evidence that differ by state or county?
Yes, and you need to check yours before the hearing.
Most states allow photographs without restriction, but several have specific rules. Illinois requires that photos entered as exhibits be dated [2]. California's Assessment Appeals Manual lists photographs among the recommended forms of supporting documentation [1]. Texas Property Tax Code Section 41.66 governs how appraisal review board hearings run and provides for documentary evidence, though counties vary on how exhibits must be labeled and submitted [7].
A few practical points that apply nearly everywhere.
Submission deadlines. Some boards make you submit evidence a set number of days before the hearing, not on the day. Cook County's Board of Review, for instance, sets specific submission windows [5]. Miss the deadline and your photos may not be admitted.
Copies for the assessor. In most places you must give a copy of your evidence to the other side (the assessor's representative) at or before the hearing. Bring two printed sets: one for the hearing officer, one for the assessor.
Digital vs. printed. Many county boards still prefer paper exhibits. Call ahead. Some take USBs or emailed PDFs; others want print.
Authentication. You may be asked to testify that you took the photos and that they show current conditions. That's simple. Tell the truth about when you shot them. Smartphone photos record the date, time, and GPS location in EXIF metadata [8], which gives you built-in authentication if anyone questions it.
For county-specific procedures, check your local assessor's site directly. Texas readers can start with the Bexar County tax assessor guide, and Georgia readers with the Gwinnett County tax assessor page. For Illinois, see the Cook County tax assessor tax bill guide.
How many photos should you take, and how do you avoid overwhelming the hearing officer?
Shoot as many as you need to document every real issue, then present a curated set.
A good rule of thumb: take 60 to 100 photos during the walk-through so you have options. Submit 20 to 35 of the strongest, clearly relevant ones. More than 40 exhibits on a residential appeal works against you. Hearing officers have limited time. Bury your best evidence in a pile of mediocre shots and the important images get less attention, not more.
Edit ruthlessly. If you have five photos of one water stain, keep the two that show it best, one establishing shot and one close-up, and drop the rest from your exhibit set.
Group the photos logically in the printed packet: exterior together, then interior by room, then a dedicated defects section. Put your single most persuasive image on the first page. The hearing officer flips through quickly before you start talking, and first impressions matter.
Label every printed photo with its exhibit number and a one-line caption at the bottom. "Exhibit Photo 7: Foundation crack, SW corner of basement, measured 3/8 inch width" beats an unlabeled 4x6 print every time.
What mistakes do homeowners make when photographing their home for an appeal?
A handful of mistakes show up again and again, and most are easy to avoid.
Shooting too late. Appeal deadlines in most states run 30 to 90 days from the date the assessment notice was mailed [9]. People sit on the notice for weeks, then rush. Start photographing the day you decide to appeal, not the week before the hearing.
Shooting in low light. Dark, blurry photos get dismissed. Turn on every light, open the blinds, and use your phone's HDR mode if you have it. For a dim crawl space or attic, bring a work light.
Cleaning and staging first. You are not selling this house. Don't tidy up before your documentation photos. If mold is visible on a basement wall, don't scrub it first. If the grout is discolored, leave it.
Forgetting the date. Confirm your phone's clock is right. Undated or misdated photos raise credibility questions.
Photographing defects without context. A hearing officer has never seen your house and needs the layout. Include one establishing shot of each major area before you zoom in on problems.
Using photos that contradict your argument. This is the big one. Review every photo before printing. If a shot accidentally makes your kitchen look spacious and modern, cut it. If the backyard looks great with the rose garden in bloom, skip it. Include only photos that support a lower value.
In high-value counties like Los Angeles, a 1 percent assessment reduction can save thousands a year, so the effort pays. See the LA County property tax and Santa Clara property tax guides for county rules.
Should you hire a photographer or use your smartphone?
Use your smartphone. Seriously.
Real estate photographers charge $150 to $400 for a residential shoot, and they're trained to make your home look its best. That's the exact opposite of what a tax appeal needs. You want accurate documentation, not flattering angles and wide-lens distortion that inflates room size.
The one case for hiring a pro is a technical measurement dispute, like proving your recorded square footage is wrong. Even then the right hire is a licensed appraiser who can certify a floor plan sketch, not a photographer. Licensed appraisers charge $300 to $600 for a residential appraisal in most markets, and a certified appraisal is very strong appeal evidence [10].
For everyone else: your phone, good light, and two hours are the whole recipe.
The TaxFightBack appeal kit includes a room-by-room photo checklist you can download and print before the walk-through. Working through a typical 3-bedroom home takes about 90 minutes.
How do photos fit into the overall property tax appeal strategy?
Think of photos as the proof layer for every other argument you make.
Your comparable sales argument says houses like mine sell for less than my assessed value implies. Your photos prove why your house is not quite like the comps the assessor picked: the cracked driveway, the outdated kitchen, the unfinished basement.
Your cost approach argument says it would cost less to replace my house than the assessor thinks. Your photos prove the existing condition sits below average, which reduces the effective age and depreciation math.
Your factual-error argument says the assessor counted features I don't have. Your photos prove the features are absent.
In each case the photos don't stand alone. They anchor your numbers to reality. A comparable sale 10 percent below your assessed value is a data point. That same sale, plus photos showing why your home is functionally inferior to that comp, is an argument.
Appeals that win tend to follow a simple structure: here is what the assessor assumed, here is what the evidence shows, here is the dollar difference. Photographs make the middle section visible, concrete, and hard to dismiss. That's why they're worth doing carefully, even when you're doing everything else yourself.
Frequently asked questions
Do I need to photograph my home before I file the appeal, or can I do it after?
Before filing is better, because some jurisdictions require you to submit evidence with the appeal petition itself. Even where evidence can come later, photographing early locks in the current condition and kills any argument that you photographed damage that happened after the assessment date. The assessment date is usually January 1 of the tax year; shoot as close to that date as you can.
Will the assessor see my photos before the hearing?
In most jurisdictions, yes. Many states require you to exchange evidence with the assessor's office before the hearing, often 5 to 15 days in advance. This is useful: an assessor who sees clear photo evidence of an error will sometimes settle before the hearing date, saving everyone time. Check your state's appeal board rules for the specific disclosure deadline.
Can I use photos taken by a previous owner or from an old MLS listing?
Old photos help in limited ways, such as showing that a defect has been present for years. They should not be your primary evidence. Hearing officers expect documentation of current conditions. Use your own recent photos as the core exhibit set and add historical photos only when they prove something specific, like long-standing deferred maintenance.
What file format should I save my photos in for digital submissions?
JPEG is fine for most submissions and is what smartphones produce by default. PDF is often preferred when you're combining photos with a written statement, since a single PDF with labeled photos and captions is easier to navigate than a folder of image files. Check the board's specific submission format before you compile your evidence.
Can photos prove my square footage is wrong?
Photos can document a discrepancy but usually can't prove it precisely. If your data card says 1,800 square feet and you think that's wrong, the strongest evidence is a floor plan sketch with measurements, ideally certified by a licensed appraiser or contractor. Photos of each room with a tape measure visible are supporting evidence, not primary proof of square footage.
How do I photograph a defect that's inside a wall or not visible?
You can't photograph what you can't see, but you can photograph the symptoms: a bulging wall, a soft spot in flooring, a musty smell backed by a moisture meter reading. Pair those photos with a written contractor estimate describing the underlying problem. The estimate describes the hidden defect; the photos prove the visible symptoms. Together they're credible even without opening the wall.
Should I take video instead of photos?
Video helps for conditions that are hard to catch in one frame, like a door that won't close, a floor that visibly slopes, or water actively dripping. Most boards accept video, but verify with yours first. Still photos are easier to print, label, and submit as formal exhibits. Take both if you have a condition that video documents better.
Can I photograph comparable properties nearby to support my appeal?
Yes, and it's a smart move. Photos of comparable properties that sold for less than your assessed value support your argument that the assessor's value is too high. Focus on exterior condition: siding, landscaping, driveways, and overall upkeep. If your comp looks better maintained than your home, photograph the contrast. Just don't trespass on private property to get the shot.
What if my hearing board only allows a certain number of exhibits?
Some boards cap exhibit submissions at a set number of items. If yours does, consolidate multiple photos onto one printed page (4 to 6 images per page works well) so each page counts as a single exhibit. Label each page clearly. This gets 30 or more images in front of the hearing officer while staying within a limit of 5 or 6 exhibit pages.
Does it help to get a professional appraisal to go along with my photos?
A certified appraisal is the strongest evidence at an appeal, but it costs $300 to $600 for a typical residential property. It makes sense when your potential tax savings over two or three years exceed that cost. For smaller savings, a well-organized photo set plus comparable sales usually builds a strong enough case without the appraisal. Appraisals earn their cost when the dispute is large or complex.
How does the assessor's property record card affect what I should photograph?
The property record card is your photography checklist. Request it before you shoot. Every field that's inaccurate or inflated is a target: condition grade, quality grade, finished square footage, bathroom count, presence of a fireplace or garage. Photograph the reality and set it next to what the card says. Visible contradictions between your photos and the card are the easiest appeals to win.
What happens if I forget to photograph something important before the hearing?
If your hearing hasn't happened yet, go back and photograph it now. If you've already submitted evidence, ask the board whether supplemental evidence can be added before the hearing date. If the hearing is past, the oversight may hurt your current appeal, but you can document it for next year's cycle. Most assessments update annually or every few years, so the window for correction comes back around.
Sources
- California State Board of Equalization, Assessment Appeals Manual: California's Board of Equalization lists photographs of the property as acceptable evidence in assessment appeals
- Illinois Property Tax Appeal Board, Rules and Procedures: Illinois PTAB rules require that photographs entered as exhibits be dated
- International Association of Assessing Officers, Standard on Mass Appraisal of Real Property: Assessors use property record cards that capture condition grade, quality grade, square footage, and improvements under mass appraisal methods
- International Association of Assessing Officers, standards on external obsolescence in valuation: External obsolescence factors such as proximity to negative land uses are recognized under cost and income approaches to value
- Cook County Board of Review, Online Evidence Submission: Cook County Board of Review has an online evidence submission portal for residential and commercial appeals
- Lincoln Institute of Land Policy, research on property tax administration: Residential assessment appeals succeed at higher rates when appellants present multiple forms of evidence rather than a single argument
- Texas Property Tax Code Section 41.66, Conduct of Appraisal Review Board Hearings: Texas Property Tax Code Section 41.66 governs conduct of ARB hearings and contemplates submission of documentary evidence
- National Institute of Standards and Technology, digital photography metadata publications: Smartphone photos automatically embed date, time, and GPS location in EXIF metadata, providing built-in authentication
- National Taxpayers Union Foundation, Guide to Property Tax Appeals: Appeal deadlines in most states run 30 to 90 days from the date the assessment notice was mailed
- Appraisal Institute, Residential Appraisal Fees and Standards: Licensed residential appraisers charge approximately $300 to $600 for a standard single-family home appraisal in most U.S. markets